Back to TheWorxHub for Senior Living Main Menu
File Manager
The File Manager in TheWorxHub enables you to build a library of frequently used files, such as manuals and procedures, making the data easily accessible to your staff. Files can be uploaded once to a single location, and then linked to as many work orders and assets as needed.
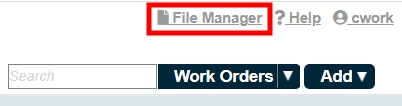
- To access the File Manager, click on the File Manager link in the top right corner of the Homepage.
File Library
The File Library allows you to view your resource files from a centralized location. You can search and filter the list to quickly find a specific file. You can also preview the details of a file before downloading it to your computer.
- Enter text into the search field for the column you would like to filter. As you type, the list will be filtered for files with a matching record.
- Use the Name column to filter based on the name of the file.
- Use the Description column to filter for text entered into the Notes field of the file.
- Use the Site column to filter based on the site that originated the file.
- Use the File Area column to filter based on the source page of the upload.
- Use the Upload Date column to filter based on the date the file was uploaded.
- Use the Uploaded By column to filter based on the user that uploaded the file.
- Use the Size (MB) column to filter based on the size of the file.
- To filter a column using multiple values, hover you mouse over the column name and click the hamburger icon (
 ).
). - Enter the additional values using the AND or OR operators.
- To remove the filters, select the Clear Filters button.
- You can also sort the list by clicking on the column heading.
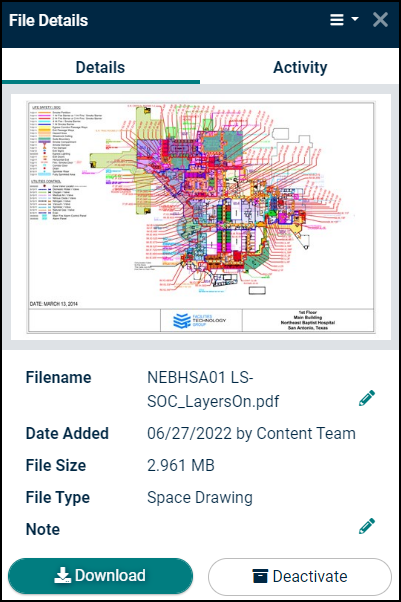
- Click on the file you would like to view. This will expand a side panel with details about the file.
- Click the Download button to download the file to your computer.
How to Add a File to the File Manager
You can add a file directly to the File Manager in TheWorxHub by choosing a file from your computer, linking a file from a Dropbox account, or linking a document or webpage from a URL.
- Click the +New File button in the top left-hand corner of the page.
- Select Choose File, Dropbox, or URL.
- Select Choose File to upload a file from your computer.
- Select Dropbox to link to a file in a Dropbox account.
- Select URL to enter a link to a document or file on a web page.
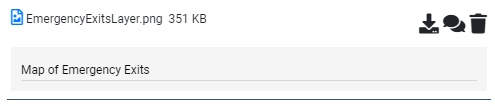
- Once you have uploaded the file, a panel will expand with three options:
- (
 ) Download: Click this icon to download the file to your computer.
 - (
 ) Comment: Click this icon to enter any relevant notes about this file.
 - (
 ) Delete: Click this icon to delete this file from the file library.
- (
- Click Done to close the panel and return to the file library.
How to Manage Uploaded Files
You have multiple options for managing files that have already been uploaded to the File Library. You can deactivate, replace, and edit files, if needed.
Deactivating a File
You can deactivate files in your File Library, allowing you to better maintain your library by hiding any unwanted files. Deactivating a file will remove it from all attachment panels in TheWorxHub where it is used, such as the work order, asset, or staff forms. It will also no longer appear in the attachment pop-up window when attaching a file to a work order, asset, etc. *Note: To deactivate a file, you will need the "Can deactivate files" permission. Only users with this permission will be able to deactivate files or view deactivated files.
- Click on the file you would like to deactivate from the list. The File Details panel will expand.
- Click the Deactivate button. A confirmation window will appear.
- Click Continue.
Replacing a File
You can replace a file in the File Library. This will deactivate the old file and add the new one to all the attachment panels in TheWorxHub where the old file was being used. This can be extremely beneficial in cases where you have several assets that are similar, and you would like to replace the old document attached to those assets with a new one, all at once.
- Click on the file you would like to replace from the list. The File Details panel will expand.
- Click on the menu icon (
 ) at the top of the panel.
 - Click Replace File. A confirmation window will display.
- Click Yes. Then, select the file that should replace the original from your computer.

Editing a File
You can rename a file in the File Library. Additionally, you can edit notes that are attached to the file without re-uploading.
- Click on the file you would like to edit from the list. The File Details panel will expand.
- Click on the pencil icon (
 ) next to Filename.
 - Enter the new name for the file and then press "Enter" on your keyboard.
- Click on the pencil icon ( ) next to Note.
- Enter the new note for the file and then press "Enter" on your keyboard.
- Click the close icon (
 ) in the top right hand corner to return to the file library.
Viewing the Activity Log for a File
You can view a history of actions taken on a file in the File Library.
- Click on the file you would like to view from the list. The File Details panel will expand.
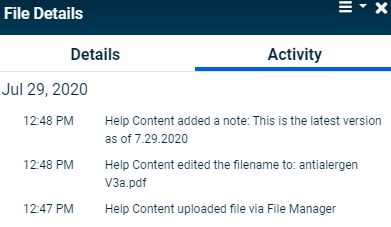
- Click on the Activity tab to display the Activity Log.
- A new record is added to the Activity Log each time a:
- File is uploaded.
- Note is added to a file.
- File Note is edited.
- File Name is edited.
- File is deactivated.
- File is used on new attachment panels in TheWorxHub.